Before our CAD project we had a quick skills for making project when we were thought the basic skills on a flatbed sewing machine and produced a calico shirt and a pair of shorts. I really enjoyed this module as it was on the machines which are where I feel I have a natural talent at. So I was extremely please to hear that we would be doing another making project and it was all based around denim.


After a long thought process I
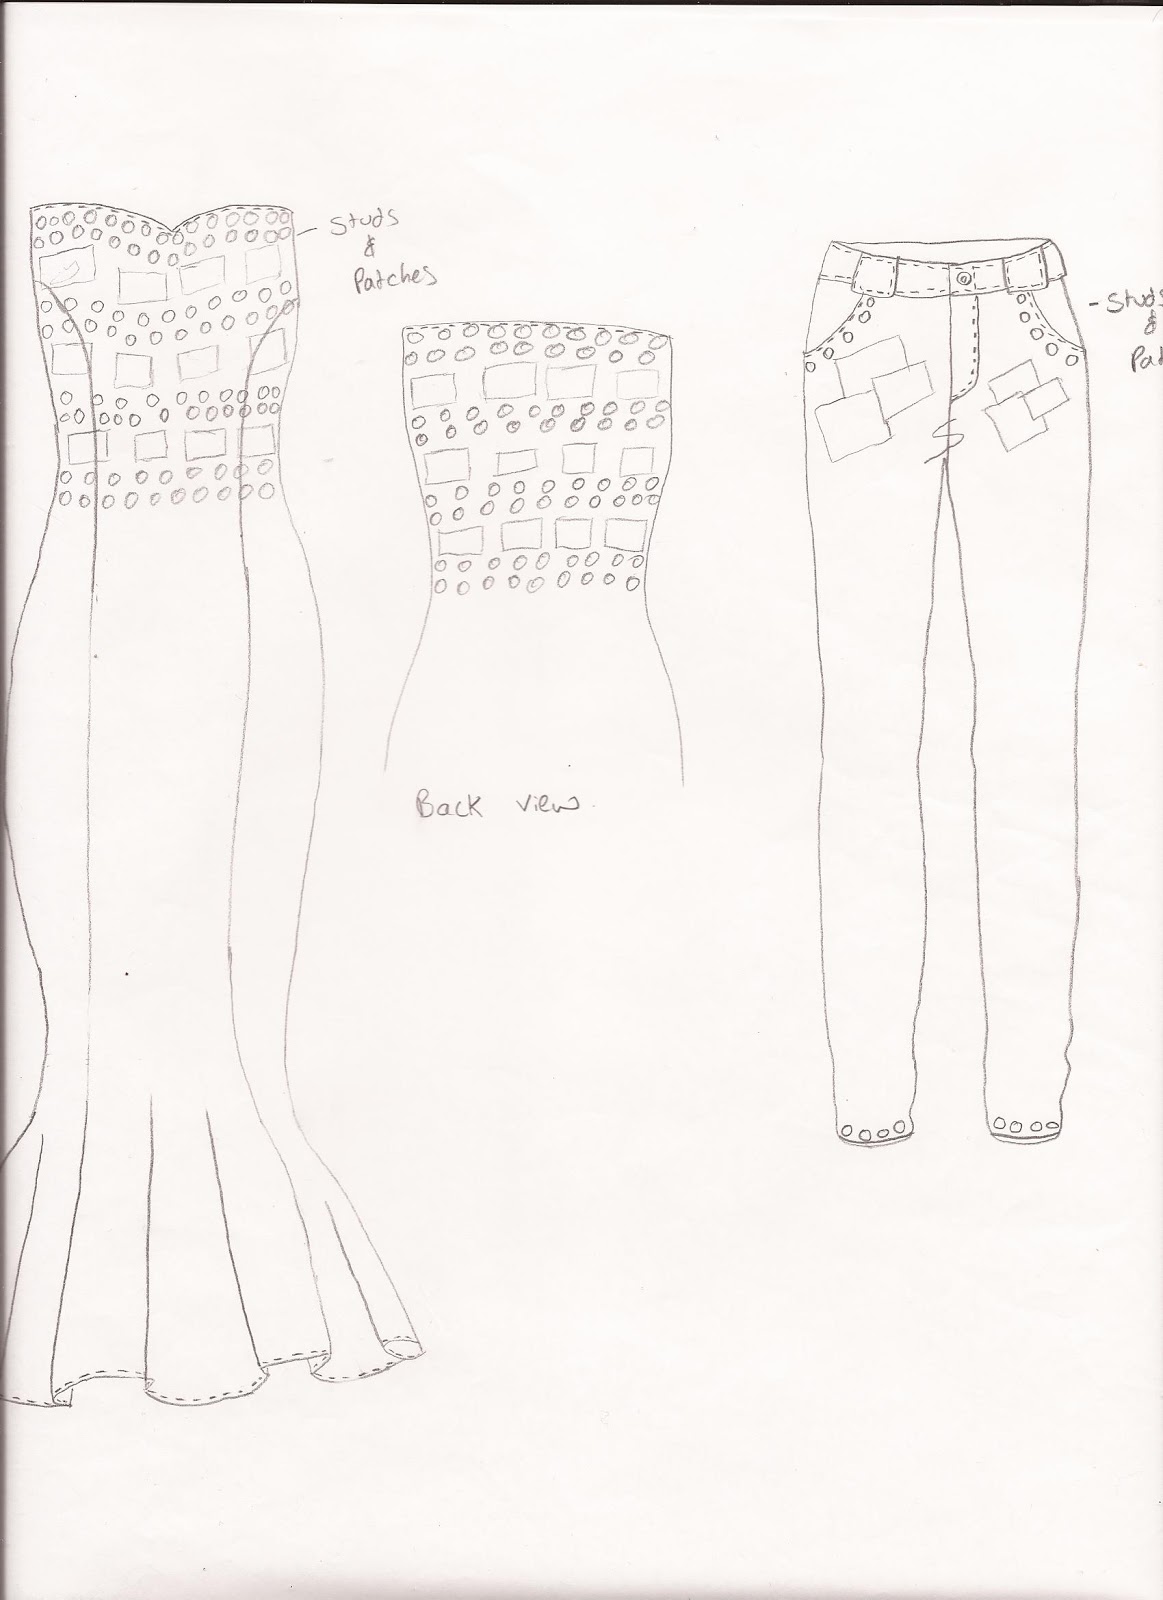
had decided to make the jumpsuit design. Just like other projects I made a
toile before my final garment to check that all of my measurements from my
pattern pieces where correct and that it lay and looked the way that I desired. To
start my toile I laid all my pattern pieces out along my fabric making sure
that all the grain lines where matched up and were straight. After I had
checked this I cut out my entire lot of pattern piece.
I started with the top of my jumpsuit,
so first I had the collar, edge stitching along the ‘wrong’ side, leaving the
inside of the collar left out. After
this I attached the front two parts of my top together down the front seam.
Just before I was about to attach my collar to the top I realised that it was
too long so would been trimming down and the collar pattern would need changing
too. Also while we were thinking about
how we would attach the collar to the top we realised that I would need to cut
a ‘lining’ for the top so that I would be able to bag out the collar.
I then came across another problem. Even
though I was going to bag out the collar the part that goes around the neck
would be still left open with a raw edge. And yet another problem that I faced
was; how was the person going to be able to get it over their head.
When overcoming this problem I made a
‘peter pan’ collar and added extra to be like a button wrap to be able to add a
little hoop and button to allow the user to get their head in and out. I then
attached my collar to the top bring the lining up and bagging in the collar
securing it and hiding the rough edge. I then folded the other rough sides on
themselves and edge stitched the side together. When making my real collar and
top I have to remember to make sure that the side of the collar with the edge
stitching should be hidden this is the ‘wrong’ side.
The next part to do was to measure how
long the top had to be to be able to fit onto the pants it left me with
4centimeters to gather 2 on each side under the bust. Now the top is ready to be
attached top the pants.
After I had finished the top I moved
onto the pants. Firstly I attached the pocket bag to the pants stitching along
the top, I then turned the bag over and top stitched top of the bag, so that it
would lay flat. I next added the pocket lining by sewing it together to seal
the pocket. That was the front of the pants done; next I added the darts in the
back of the pants and joined the side seams of the pants and the inside leg.
After I had joined these I realised that they did not match correctly at the
bottom so I would have to go back to my pattern to check that they go to the
same length. The next thing that I had to do was pin together the body rise
indicating where my zip would go, using the invisible zip foot I added the zip and
closed up the rest of the pants, and removed pins.
The
last thing that I had to do was attach the top to the pants. After it was
finished I tried it on a class mate to see how it fitted. I used pins and drew on the toile to indicate
any alterations.


I was really impressed with myself with my final garment, it
looked like I had wanted it to and although there were some small challenges
along the way I think that those were the best ways to help me learn to make mistakes.
In the past I had used an embroidery machine before but not the same size as I
did for my leg piece, it was great to be able to use other machinery available to
me to try to come up with different effects and styles, and not have the piece
solely focused on the design and cut. I also thought that the jumpsuit looked
very professional and think that it gave me a confidence boast to try bigger
and better things for the next time I have a making project. Obviously my grade
reflected how confident I was with my garment as I ended up with a distinction.